Stretchy Belt Arrives

figure 1


figure 2
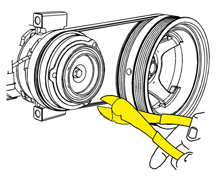
figure 3
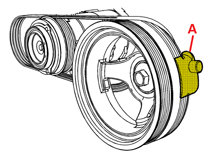
figure 4
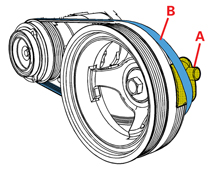
figure 5
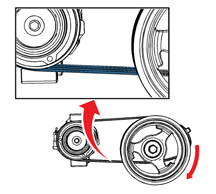
figure 6
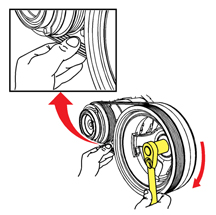
figure 7

figure 8
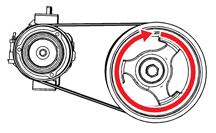
figure 9
|
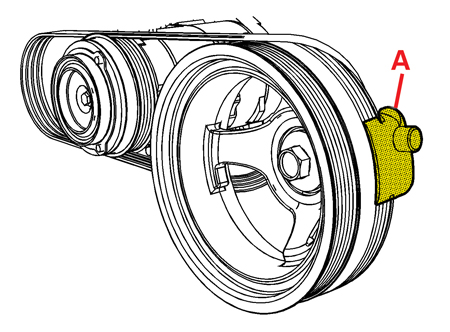
With the introduction of the LH8 small-block V8 engine in the 2008 Hummer H3 Alpha, GM is implementing a new design accessory drive belt (fig.1). It's called a "stretchy" belt, and it doesn't have a belt tensioner. In one respect, the stretchy belt resembles a rubber band -- it applies tension when it's pulled slightly beyond its relaxed length.
The once-universal V-belt had two drawbacks. First, one of the accessory drive components had to be adjustable in order to install and apply tension to the belt. And second, as the belt was used, it became necessary to check and occasionally adjust tension.
The serpentine belt eliminated both of these drawbacks by adding a spring-loaded tensioner that eased installation and automatically maintained the proper tension. But the tensioner added cost, weight and complexity.
The stretchy belt goes even further. Its big advantages are that it doesn't require a tensioner, simplifies design and eliminates weight from the engine.
Initially, the stretchy belt is being used between the engine balancer and AC compressor. It eliminates the need for a secondary belt tensioner. The serpentine belt continues to be used to drive the power steering pump, generator and water pump and remains unchanged. The primary belt is tensioned by the primary belt tensioner.
Just What is a Stretchy Belt?
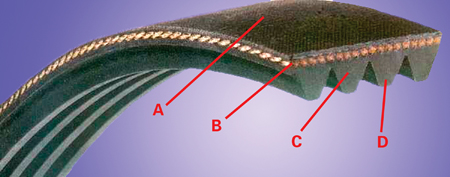
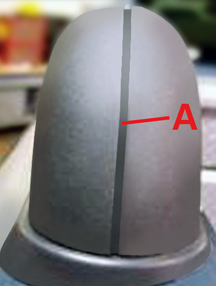
The outward appearance of the stretchy belt is similar to the current design serpentine belt. The new design reinforcing cord (fig. 2) provides its unique qualities. The new belt cord is made of a polyamid material. The polyamid cord is more elastic thant the more traditional aramid or plyester cord designs.
A Back compound
B Reinforcing cord
C Cushion compound
D Rib compound
Polyamid cord, when combined with a more elastic backing compound, ensures that the belt is able to maintain the specified tension within the specified range of usage. The belt is designed to maintain tension for 150,000 miles (240,000 kilometers).
How is the Stretchy Belt Serviced?
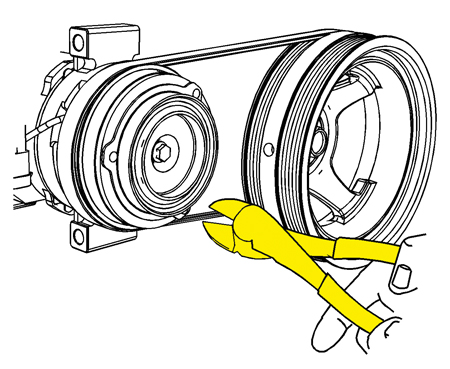
IMPORTANT: The stretchy belt must not be re-used. Always replace with a new belt.
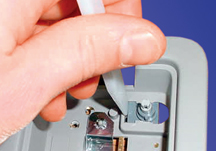
Removal -- To remove the stretchy belt, simply cut it with a razor knife or cutting pliers
(fig. 3)
Installation -- As implied by its name, the stretchy belt is installed by carefully stretching it over the flanges of the pulleys. Nothing has to be loosened, and there is no tensioner.
TIP: The replacement stretchy belt is packaged with a disposable installation tool.
1. Position the belt behind the rear face of the balancer and off of the AC pulley. Install the tool onto the balancer (fig. 4).
A Installation tool
2. Slide the tool upward, installing the belt onto the tool (fig. 5). Slide the tool downward, positioning the belt onto the AC pulley and applying light tension to the belt.
A Installation tool
B Belt
3. Position the lower portion of the belt with the ribbed area facing forward (fig. 6).
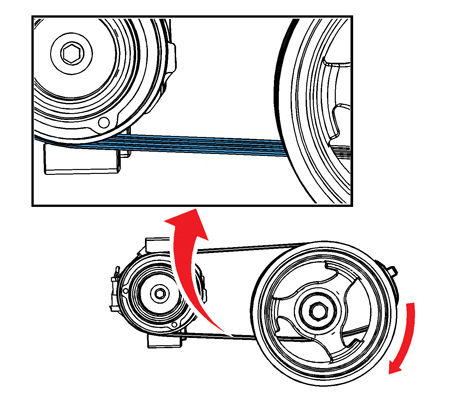
4. Using a breaker bar and socket on the balancer bolt, rotate the crankshaft balancer slowly in the clockwise direction (fig. 7). At the same time, using a second hand, ensure the belt ribbed area remains facing forward. Use mild finger pressure to pull the belt forward to ensure the belt aligns properly to the AC pulley.
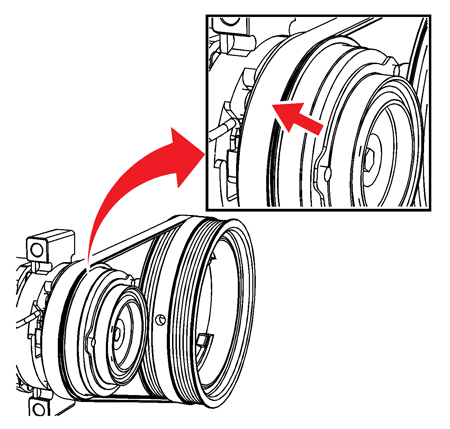
5. Inspect the belt for proper alignment onto the AC pulley (fig. 8).
6. With the belt located on the pulleys, rotate the balancer an additional 360° to ensure proper belt installation (fig. 9).
- Thanks to Ron Minoletti
| 


 Truck Issues — Fix It Right the
First Time
Truck Issues — Fix It Right the
First Time  Powertrain Issues — Fix It Right the
First Time
Powertrain Issues — Fix It Right the
First Time 