
| Note: Click a picture or illustration in the left column to view a large version in the article. To hide the large version, simply click on it. |
|
|
|||||||||||
Multiple Diagnostic Interface
|
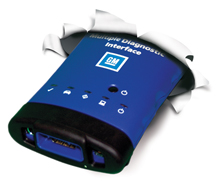
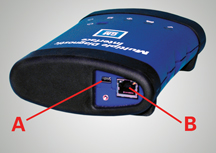
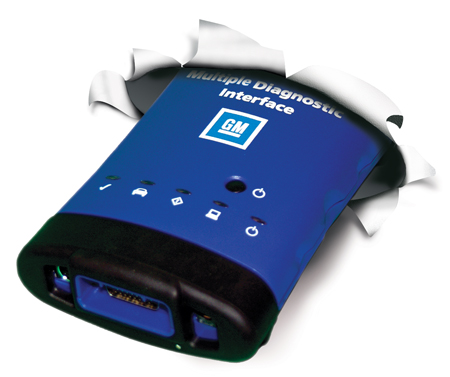
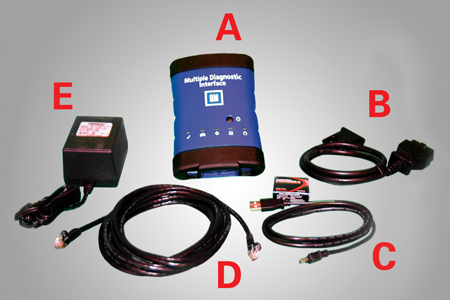
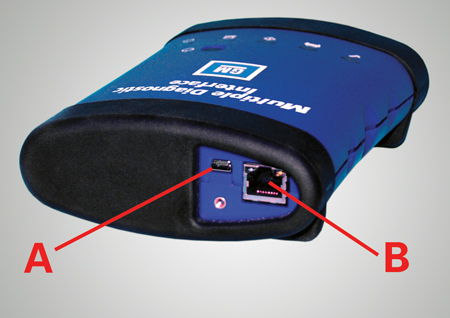
The GM Multiple Diagnostic Interface (MDI) EL-47955 is being shipped to NAO dealers the third quarter of 2007, one per dealer. (fig. 1) The January 2007 issue of TechLink introduced you to the new GM MDI. It is a compact communication module that manages the transfer of data between a vehicle’s onboard ECU network and a PC. When software coverage on the GM MDI is fully operational, all diagnostic and reprogramming for GM vehicles globally will be supported with this one piece of hardware. A GM MDI A Mini USB connector
To use a wireless access point, you will need: 1. Wireless access point (see table) 2. Cat 5e or Cat 6 Ethernet cables 3. Additional IP addresses from your Dealer Management Service if they are required. (This may be required for static IPs only.)
- Thanks to Matt Singer and Mark Palmer | ||||||||||

|
||
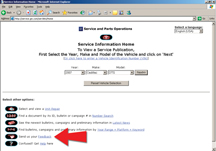
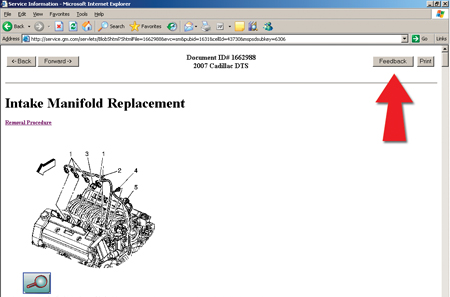
The Techline team appreciates when users take a moment to share with us their feedback regarding our websites. Our goal is to quickly provide GM technicians the information they need to service our vehicles. Second, on every service document in SI, there is a Feedback button in the upper right corner (fig. 5). Click on this button to open the Feedback form. Once the feedback form is open, fill in all of the relevant blanks, including your name, dealer name, dealer code, etc. |
||


|
||
Programming Tip |
Has this ever happened to you? After programming a module, certain features don't work. This could apply to any vehicle module, but particularly modules on the low speed GMLAN bus. |
|
|
||
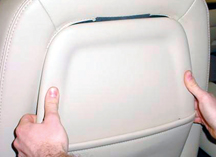
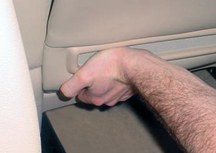
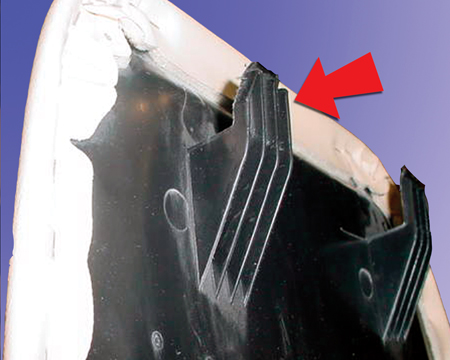
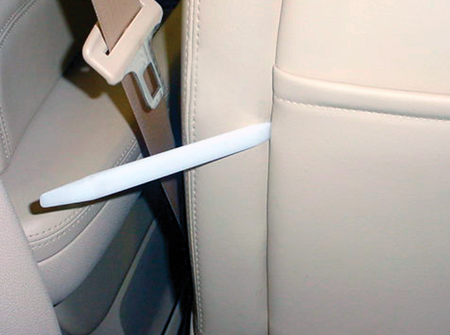
Seatback Removal |
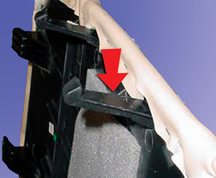
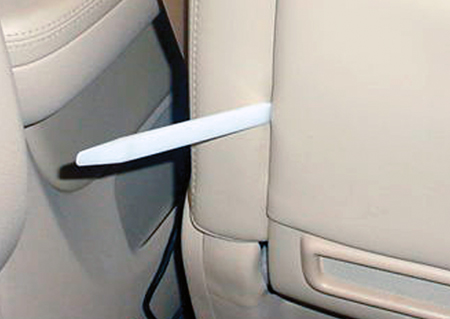
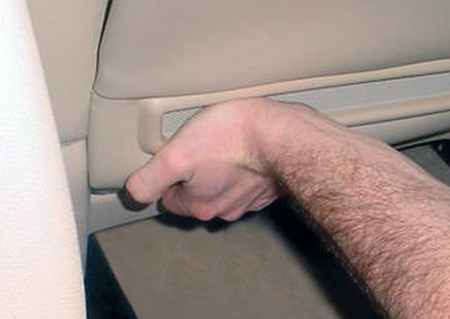
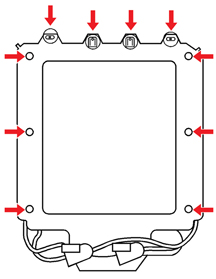
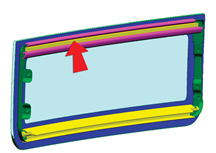
These tips show how to remove the seatback on the new fullsize utilities. The retainers (fig. 6) are very robust, and can be disengaged without damage, following these steps. Top tab (fig. 7) Side retainer (fig. 8) Lower tab (fig. 9) 1. On the right and left sides of the upper portion of the seatback, insert a flat bladed tool (trim stick) between the seatback and the seat cushion to release the retainer tabs (fig. 10). Push the tool against the tabs to release. TIP: There is no need to pry on the seatback with the tool. 2. Carefully flex the seatback outward to slide the top tabs out of the retainer slots (fig. 11). 3. On right and left sides of the lower portion of the seatback (fig. 12), insert a flat bladed tool between the seatback and the seat cushion to release the retainer tabs. 4. Carefully pull back on the seatback. All released tabs must be clear of obstructions. 5. On the right side of the seatback, place your fingertips underneath the seatback. Apply a small force inward with your palm to release the tab (fig. 13). Carefully lift up the right side of the seatback. 6. On the left side of the seatback, place your fingertips underneath the seatback. Apply a small force inward with your palm to release the tab. Carefully lift up the left side of the seatback. - Thanks to Adam Freeman and Dave Roland |
|


|
||
VME Ends
|
GM Service Voice Mail Express (VME) ends on June 1, 2007. When Service VME launched in 2000, it was the quickest way to get service information to dealers. With the present capability to update service information in SI and DealerWorld daily, we are now able to quickly send a GM Messenger Message, and it can be printed or forwarded. Service VME messages will transition into GM Messenger Messages under the Functional Role: Service Manager. |
|
|
||
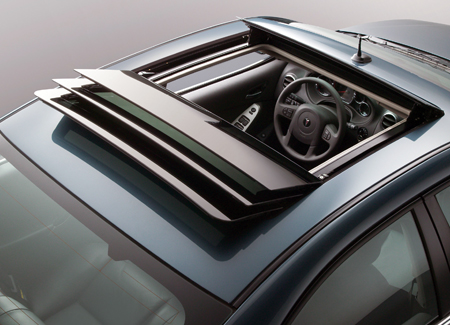
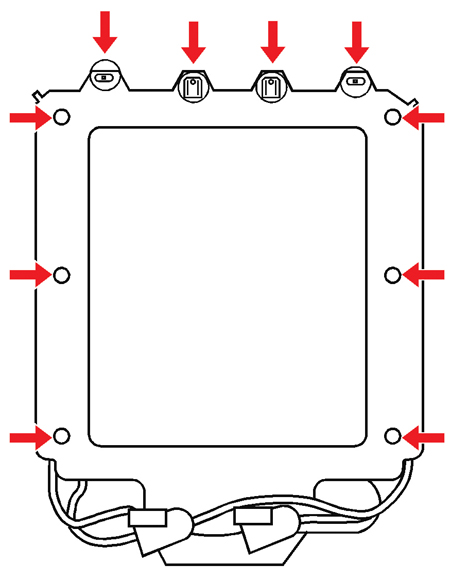
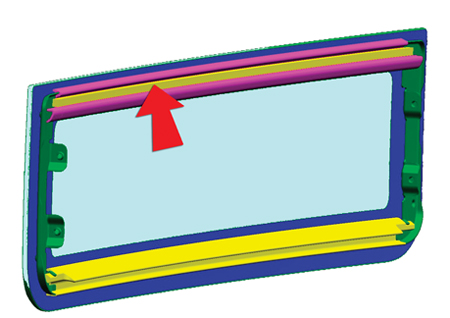
A recent bulletin 05-08-67-014 update provides general guidelines to noise issues with the panoramic sunroof in the Pontiac G6 (fig. 14). Here are highlights of two of the conditions described in the bulletin. US dealers, also refer to Tech Assist course 50250.17T1 Multi-Panel Panoramic Roof Adjustments for more information. TIP: Use Super Lube only. No fastener adjustments are necessary unless noise is still present after lubrication. TIP: Some leakage is normal at the T-joints by design. - Thanks to Ashmi Haria and Ray Romeo |
||

|
||
Body Control Module (BCM) Grounds
|
This information applies to 2006-07 Buick Lucerne, Cadillac DTS, Chevrolet Impala, Monte Carlo, 2007 Cadillac SRX, Chevrolet Avalanche, Equinox, Silverado, Suburban, Tahoe, GMC Acadia, Sierra, Yukon, Yukon XL, Yukon Denali, Yukon Denali XL, Pontiac Torrent, and Saturn Outlook. |
|
|
||||||||||
| Passenger Sensing System
Correction |
There was an error in the explanation of the flashing codes in the Passenger Sensing System article on page 7 of the April issue. Here is the correction, shown in red. Then it will display the most significant digit of the DTC by commanding the OFF telltale to flash for a number of times representing the digit. After the most significant digit has been displayed, the system will display the least significant digit by flashing the ON telltale. For example, DTC 36 will flash the OFF telltale 3 times, then the ON telltale 6 times. - Thanks to Esther Anderson
|
|||||||||
|
|||||||||||||||||||||||
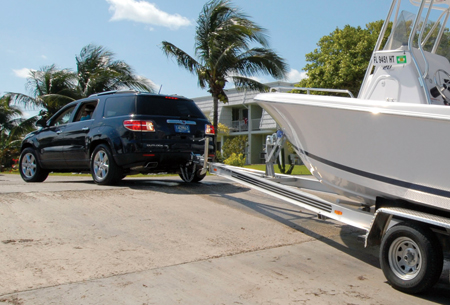
Recreational Vehicle and Trailer Towing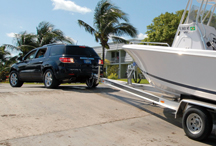 figure 17 |
This information applies to the 2007 Saturn Outlook and GMC Acadia. Details will be covered in an upcoming bulletin. Here are highlights.
To find the original part number, remove the UBEC and look at the side of the UBEC. It is necessary to modify the wiring harness at the Body Control Module (BCM).
* Unlimited miles at 65 mph (105 km/h). To avoid vehicle damage, never exceed 65 mph (105 km/h). The repairs would not be covered by the warranty. |
||||||||||||||||||||||
|
||
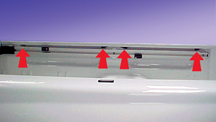
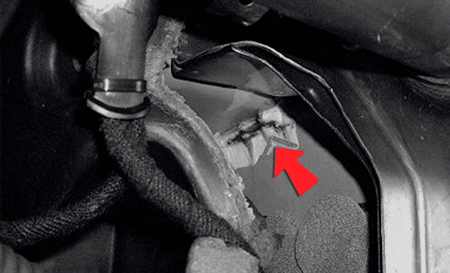
Some owners of a 2007 Silverado or GMC Sierra may comment on the openings under the bed rails near the stake pockets (fig. 18). While the openings on the new Silverado and Sierra are more visible, the Classic Silverado and Sierra had similar openings around the stake pockets. The openings are required for the unique forming process of the new pickup box side inner stamping. The new design has equivalent performance for dust and moisture intrusion when compared to the previous design. TIP: The pickup box is not designed to be sealed completely from dust or moisture intrusion. |
||

|
||
Flashing A/C Indicator Lamp
|
This information applies to the following vehicles: |
|
|
||
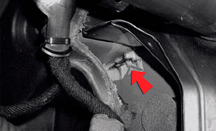
The owner of a 2003-07 Saab 9-3 may comment on wet carpet on the right side floor. An area under the bulkhead cover on the passenger side may have had sealer improperly installed. If no sealer is present at either location or there are skips in the sealant, remove the exiting sealant, clean the surfaces and apply new sealant. Test for leaks. - Thanks to Jeff Gorenflo |
||

|
||
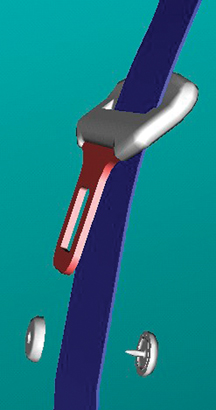
This information applies to all GM vehicles. All seat belt retractor assemblies contain a stop button (fig. 21). If a stop button becomes damaged, the button can be replaced by ordering a replacement button through the GM parts catalog. The seat belt retractor assembly does not need replacement. |
||
|
||
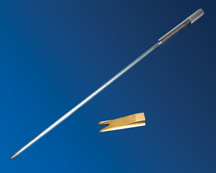
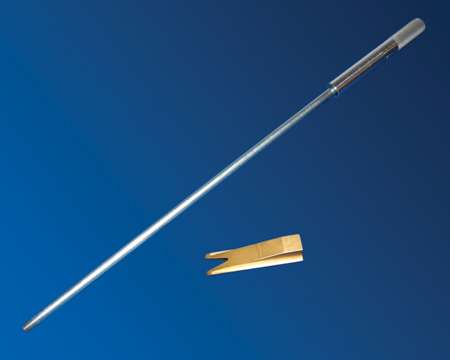
Observe this reminder when performing the procedure covered in the March 2007 TechLink article on the Lower Timing Gear Tensioner Holding Tool Tips. - Thanks to Duane Raymond |
||
|
|||||||||||||||||||||||||||||||||||||||||||||||||||||||
|
|||||||||||||||||||||||||||||||||||||||||||||||||||||||
|

|
|||||||||||||||||||||||||||||||||||
|
|||||||||||||||||||||||||||||||||||
|
 Truck Issues — Fix It Right the
First Time
Truck Issues — Fix It Right the
First Time
|
||||||||||||||||||||
|
||||||||||||||||||||
|
 Powertrain Issues — Fix It Right the
First Time
Powertrain Issues — Fix It Right the
First Time
|
|||||||||||
Know-How Broadcasts for July
|
|
||||||||||
|
|||||||||||
